A builder's guide for the home renovator

How to Change a Leaky Tap Washer

There are a few reasons why a tap leaks.

  1. The most common reason is that the tap washer is worn out
  2. The seat of the tap is damaged 
  3. There’s a build up of something and the tap needs reseating.

Reseating simply means shaved back to make it flat so the tap washer when it is tightened down on it no water can leak under the washer

It really doesn’t take much for water under pressure to leak. Taps can leak from the top of the spindle which means the small o ring on the spindle has worn. The body washer which is usually a red fib-or washer at the base of the tap is broken. These are all easy things to fix .

Tools & Materials

The How To

Step 1

The mains water to the house must be turned off. In most cases a meter box can be found on the footpath outside the home.

Lift the lid and turn the tap off. This will stop the supply of water to your house. If you live in a unit/duplex or town house the stop cock could be in a cupboard in the laundry or under a sink. Alternatively you could find it in the bathroom ceiling – if you see a manhole in the bathroom or toilet it may be in there. I’ve even found them in the garage so you may have to go hunting for it .    

Before taking the tap head off make sure you turn the tap on. By doing this you’ll release the pressure in the pipes. It’s also not good to undo the tap head when the washer is tight down on the seat of the tap.

Remember this when you have replaced the washer and tighten the tap head down. Make sure the tap is turned on full because when you tighten tap head down and the tap is on, the tap head will not tighten down fully and when you turn the mains water back on the tap head will be lose and the body washer will leak leading to further problems This could also damage the new washer.

Unscrew the tap head anticlockwise and lift the tap head out of the tap

You’ll find the tap washer can be in all kinds of condition it may even look ok which means the seat of the tap must be damaged, sometimes the rubber washer will get stuck in side the tap when you pull it out so use your long nose pliers to remove the rubber washer ,

After removing the washer place you finger down inside the tap and gently twist your finger to feel what condition the seat is in.

If you’re unsure then attach the reseating tool to your drill firmly. Screw your reseating tool on to the tap like you would be reinstalling you tap , screw  the reseating tool down  clock wise by hand not too tight then hold the drill down firmly and turn the drill on for approximately 3 to 4 seconds.

Tip: Before turning the drill off, lift the drill up so the reseating blade doesn’t stop hard on the seat of the tap and leave a mark. Gently push down and turn drill on, lift the drill up then turn the drill off ,remove the re seater and have a look down the tap and you will see the brass seat will be shining and if there is a little mark that has worn through the seat it will show up very clearly it will be a dark line , you will have to attach the re seater again and repeat the process , repeat until the mark has gone, there will be a build up of brass shavings in the tap so remember to leave tap on then you turn mains water back on to flush out the shavings before you turn the tap off so it’s nice and clean inside the tap and you haven’t squashed down brass shavings onto you nice clean seat , taps inside the house usually have a small filter at the end of the spout make shore you remove the filter before flushing brass filing out otherwise they will clog up the filter and you will have very poor water flow.

Another good thing to do while your changing tap washer is to service the tap and change the o ring and grease the spindle,

When you have the tap in your hand and you have taken old tap washer out then hold the tap and screw the tap handle down as if you were turning the tap on and the spindle will screw out of the tap ,  clean the thread and o ring of all dirt a old grease then change the o ring  after changing the o ring grease the thread and o ring with some tap grease then screw it back into the tap

More to explore

just found a drummy tile in the shower

How to Fix Loose Shower Tiles

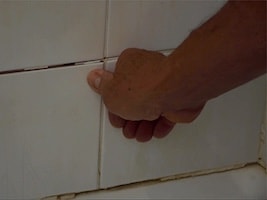
by Martin Updated April 8 2024 Replace loose tiles in the shower as soon as you notice they’re becoming drummy. Ignoring the
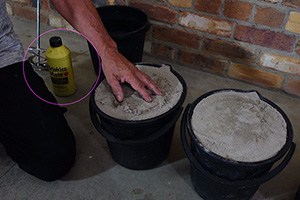
Scroll to Top