This pathway provides a good solid, neat path for light usage areas. It’s a low-cost solution for connecting garden areas and tidying up an area in the garden where grass will not grow. It’s not structural so this is not the process to use in high-traffic areas like driveways.
For this project I chose precast concrete pavers that have the appearance of timber but the advantage of never rotting out.
These are available in 2 different color combinations: charcoal and brown and the size choices are a rectangle 800mm x 230mm x 40 mm thick or a square 230mm x 230mm x 40mm thick. But there are many similar concrete products available in a range of colors and sizes.
At the end of the day choose a product that gives the look you’re after; the process is the same.
Important
Precast paver treads don’t have reinforcing steel in them so they should be bedded in concrete to give strength and stability.
Terms you should know
Boxing: This is a timber framework that acts as a guide for the height of your concrete. When the job is completed it’s removed leaving a nice clean edge.
Star pickets : You can buy star pickets to keep the boxing in place. Or cut your own timber pegs out of left over 50mm timber.
Concrete screed: You can buy a concrete screed. Or use a straight piece of timber that is longer than the width of the pathway.
This pathway can be built 2 different ways. And depending on your situation you’ll need to either build boxing as a framework for the walkway or use an existing edge. For example, you might have an existing garden edge as we have in these photos, and that will be used as a finishing point. Click on the link for the option that suits your situation.
We recommend products based on our experience and use of the products. If you use our links to make a purchase, we may earn a commission which is no additional cost to you. Find our disclosures here.
Tools & Materials
- wheelbarrow
- shovel
- concreter's trowel
- rubber mallet
- string line
- small level
- bucket
- sponge
- star pickets
- 50mm timber boxing
- concreting screed
- wet-saw (if needed to cut pavers)
As always, look after your own safety, see our full disclaimer prior to using this information.
The How To : Build a pathway with boxing
Step 1 Plan the job
- Clean the area where the walkway is to be built.
- Roughly dig out the area for planning your path.
- Remove any large stones or rocks.
- Decide on the finished height of your path, taking into account that the pavers are 40mm thick.
Step 2 Boxing
Set up timber boxing. The timber should be 50mm wide which equates to the thickness of the concrete that will be poured.
The boxing is placed around the perimeter of the pathway. To keep the boxing in place use star pickets, or timber pegs, on each corner and every meter along the edges to prevent the boxing from bowing (curving).
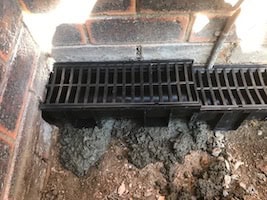
As an alternative to boxing, your walkway may butt up against part of the house or a fence which gives you a natural border on that side.
Step 3 Concrete
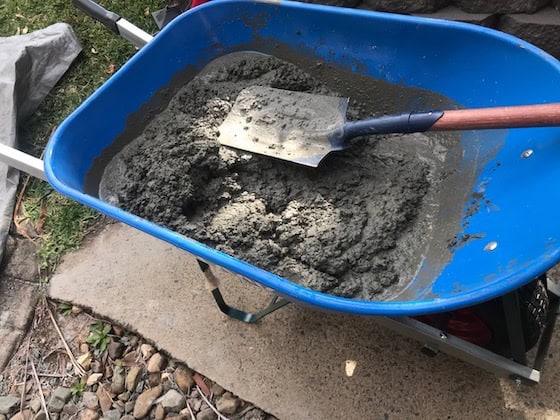
Mix up enough concrete in the wheelbarrow using the ratio 5:1.
That is 5 x level shovels of 10 mm concrete blend + 1 x level shovel of cement. Add half a bucket of water and mix thoroughly with a shovel.
Check out our VIDEO HOW TO MIX CONCRETE for tips.
If you’ve got a large job, you can hire a cement mixer to make the work easier.
Mix up enough concrete to get the job started. For example you might do a double mix 10:2:1 bucket of water.
Place the concrete where you’re going to start laying pavers. Move it around with your shovel to roughly position you want, slightly higher than the boxing.
Step 4 Screed concrete
Use a concreting screed (or a straight piece of timber that’s longer than the width of your pathway) to level the concrete.
Working the width of the walkway, place the screed on top of the boxing and move it, slowly and firmly, from left to right dragging the concrete towards you to the height of your boxing.
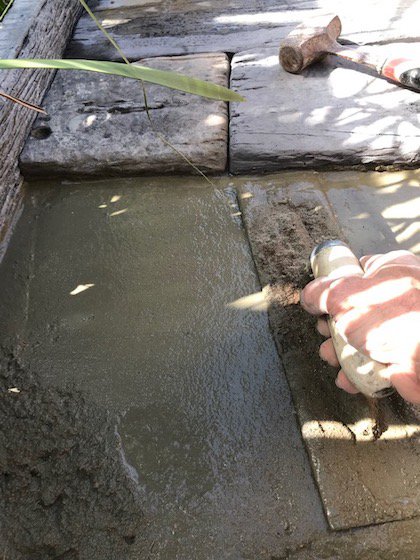
Make sure the area that you’ve screeded is wider than the paver you’re about to lay. Run over the top of the recently screeded slab with a concreter’s trowel to draw the water and cement to the top of the slab. The finish should go shiny.
Step 5 Laying the pavers
Place a concrete paver on to the concrete and tap it down gently with a rubber mallet. You shouldn’t have to adjust very much at all, if any.
The tapping is to gently vibrate it so that the paver ‘knits’ to the concrete.
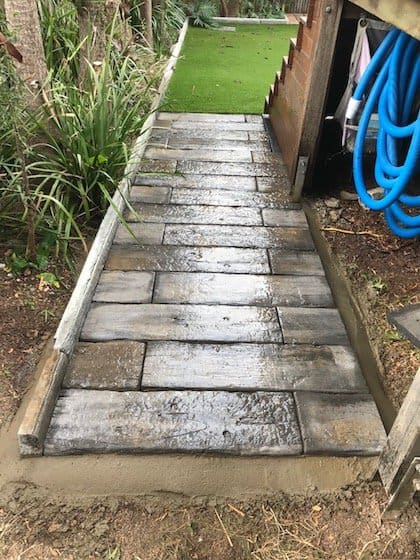
On the featured project I staggered the pattern of the pavers when I laid them. But you can use your imagination to decide what pattern you want depending how wide your pathway is and the look you’re after.
If you’re working pavers and there’s no cuts, that’s easy. However if you need to cut a paver to size you need to do that immediately so it’s ready to bed into the wet concrete.
Check out the video HOW TO USE A WET SAW
Repeat the process until paving is completed.
Step 6 Finish off
To finish, give the sleepers a good clean with a sponge and water.
Don’t walk on the pavers for approximately 24 hours, or until the concrete has had ample time to set.
How To Build a pathway next to an established garden edge
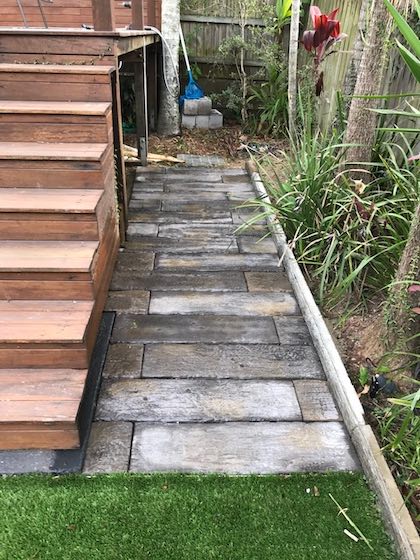
In the featured photos, the pathway followed the existing garden edge in the side garden extending along the side of the property to create a cohesive border. The aim was to seemlessly integrate the back garden with the new extension.
The opposite side of the path connected with a set of stairs and the path provided access to the space underneath them.
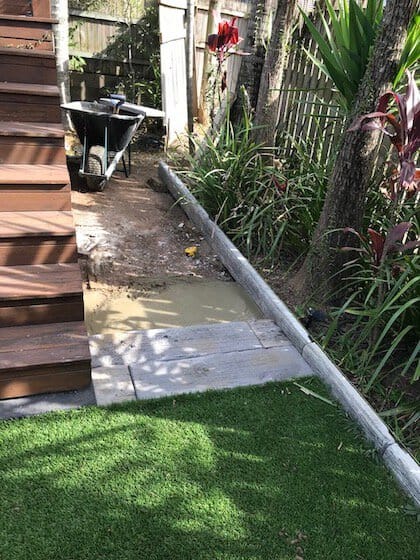
Step 1 Build a garden edge
To create a straight border: I attached a string line from the far end of the existing garden edge, and pulled the string line taut. I made the line follow the top of the existing garden edge, extending it to mark what would be my new finishing point. This provided a guide as to where the new path edge was going.
Next, dig a small trench, place concrete and garden edging.
Tap garden edge down gently to match the height of the string line.
We now have a border on both sides of the walkway.
Important
- Keep lines straight
Step 2 Dig out soil
Once the garden edge is established you’ll have a clearer understanding of the amount of soil that needs to be excavated.
In this case I measured from the top of the garden edge to the top edge of where the finished height of the paver would be (ie 50mm). This height matched the grass height.
I then allowed another 40mm for the thickness of the paver and a further 50mm for the thickness of concrete bed. In total I had to dig down 140mm (that is 50mm + 40mm + 50mm)
Step 3 Mix Concrete
Mix up concrete in the wheelbarrow. The mix ratio 5:1.
This means 5 x level shovels of 10 mm concrete blend + 1 x level shovel of cement. Add half a bucket of water and mix thoroughly with a shovel.
You may want to double that ratio and make it a 10:2: + 1 bucket of water.
Check out our video HOW TO MIX CONCRETE IN A WHEELBARROW
Hiring a cement mixer will make work easier.
Step 4
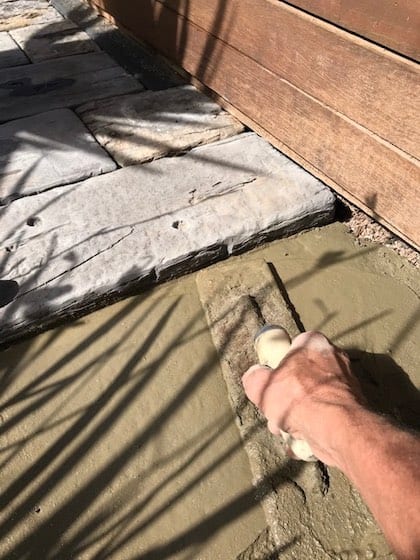
Place the concrete where you’re going to start laying pavers – a depth of 50mm.
Using a shovel, level the concrete. And then use a concreter’s trowel to smooth over to the starting point of the pavers. This should create a shiny wet surface on which to place the paver.
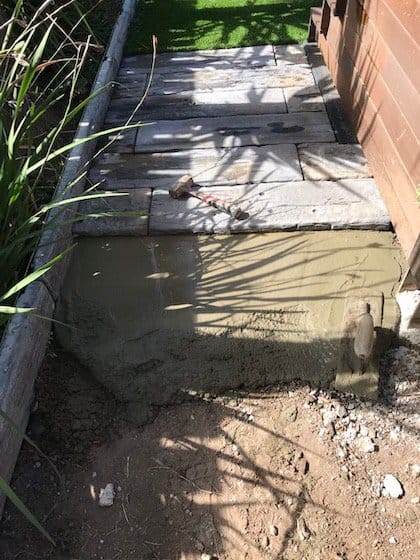
Step 5 Lay pavers
Place a paver on to the concrete and tap it down, gently, with a rubber mallet.
Measure down from the top of the garden edge to the top of the paver and make sure the depth is 50mm. (Note: this measurement relates to the finishing point for this particular job. Your finished point is whatever you want it to be.)
Place a level on top of the paver and ensure it’s sitting perfectly level.
When laying these pavers, I opted for a staggered pattern. Choose a design that complements the width of the pathway and achieves the look you’re after.
If the pavers don’t align perfectly with the pathway width, you’ll need a wet saw to trim them to fit.
Use this link to watch ‘USING A WETSAW’
Step 6 Finish
Thoroughly clean the sleepers using a sponge and water. Don’t walk on the pavers until concrete has completely set (approx 24 hours).
Precast concrete pavers are also used for an outside stairs project. Find the project on this link.