Let’s deal with issues of peeling paint on the ceiling and how to prevent mold and mildew problems. Achieve a professional finish whether you’re giving your bathroom ceiling a fresh coat of paint or painting it for the first time.

We recommend products based on our experience and benefit to our DIY community. If you use our links to make a purchase, we may earn a commission which is no additional cost to you. Read our disclosure policy here
Tools & Materials
- Semi-gloss paint
- Mould inhibitor
- Paint brush
- Paint roller with extension pole
- Roller tray
- Blue painters tape -for sharp lines
- Drop sheets - protect the surrounding area from drops and spills
- Ladder
Trade Tips
- Use a really good quality paint brush and roller
- Don’t use haphazard strokes when using a roller. Use long even rolling strokes.
- Add Mold and Mildew inhibitor to the paint
- Between coats of paint, place your roller and brush in separate plastic bags and tie the bags at the top. This stops the roller and brush from drying out.
- Wash your brushes outside on the grass. Don’t wash them in the sink, it’s not good for the environment.
The How To
Step 1
Lay out the drop sheets to cover floor, vanity etc. making sure you cover all surfaces. You don’t want to get paint on surfaces like benchtops, cabinets, taps or floors which will then need to be cleaned off.
Step 2
Add the mold and mildew inhibitor to your paint. Check the bottle, (manufacturer instructions), for the amount to add as it varies depending on the quantity of paint you’re using.
Note: Premixed paints containing mold inhibitor for bathrooms are available. These are convenient but they can be more expensive. If you want to save, buy separately and add the inhibitor to the paint yourself.
Step 3
Apply the blue painters tape to all the edges where the wall meets the ceiling. The purpose of Painters tape is to let you ‘cut in’ the straight edges without getting paint onto the adjacent surfaces. The tape is designed to release easily without damaging the surface.
You’ll achieve a nice straight finish and save time cutting in if you’re not painting the walls.
Step 4
Using a paint brush and nice long, even strokes, ‘cut in’ all the areas you won’t be able to paint with a roller.
Step 5
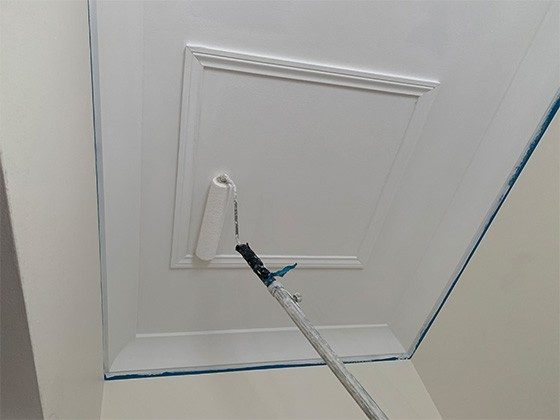
Apply paint to the roller, via the tray, and paint the ceiling using long even strokes.
Don’t push down too hard on your roller as it can create lines between strokes. When the paint dries, the excess paint that created the line will be evident – and you don’t want that.
Step 6
Leave paint to dry for 2 hours before starting the second coat.
Step 7
Apply second coat, repeating steps 4 to 6.
Step 8
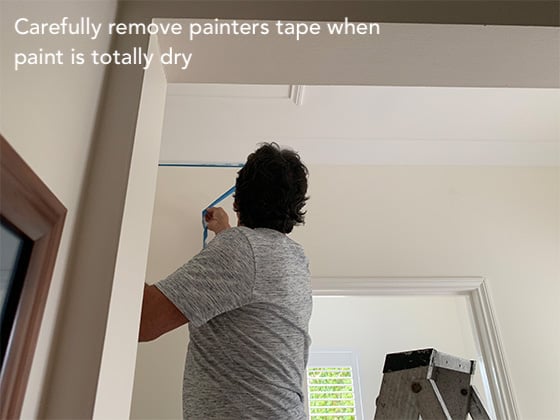
When you’ve finished painting and paint is totally dry, carefully remove the blue painters tape and clean up.
Step 9
Clean brushes and rollers, using a hose, outside on the grass. Don’t wash brushes out in the sink.

Important
If the bathroom ceiling is being painted for the first time, a sealer undercoat with a mold inhibitor should be applied as a first coat to the bare cornice and plasterboard.
Then follow with steps 2 to 8.
Troubleshooting
Why is there peeling paint on the ceiling?
The surface hasn’t been prepared correctly in the first instance. A Sealer was not used on the bare plasterboard as the very first coat.
Unfortunately if paint is already peeling on the bathroom ceiling it’s not an easy fix. This is because you’re dealing with someone else’s poor workmanship.
What’s the solution?
Option 1
You can try scraping off the paint from the entire ceiling and then follow the steps below.
Option 2
Sometimes it’s just easier to resheet the ceiling and properly prepare the bathroom ceiling from the beginning using a sealer undercoat, with a mold inhibitor, and then follow up with semi-gloss paint with inhibitor.
Option 1 : What you'll need
- Paint scraper
- Putty knife
- Fine grain sandpaper
- Vacuum sander ( if available)
- Protective eyewear
- Dust mask
- Mold killer
- Plaster
Step 1
Scrape paint. It will be messy, so lay out drop sheets on the floor. Note: All paint must be thoroughly removed.
Don’t forget the protective eyewear and a dust mask.
Step 2
Check for mold and wash ceilings with a mold killer if needed. Allow to completely dry.
Step 3
If there’s any damage to the ceiling from removing (scraping) the paint, replaster the affected areas to achieve a smooth surface finish. And then sand.
Step 4
Reseal the ceiling with a mold inhibitor sealer undercoat. Follow up with 2 coats of semi-gloss with mold inhibitor.
Important
If the paint isn’t completely removed, it won’t matter what paint you apply, you’ll probably find paint will start peeling in another area of the ceiling within a short time.
Q&A's
A semi-gloss paint with a mold inhibitor. This paint provides protection from peeling and moisture and is easier to clean. Having a mold & mildew inhibitor additive offers more protection against mold in a damp room.
Semi-gloss paint with added mold and mildew inhibitor
For general areas in the house, a flat ceiling paint because it hides imperfections on the joins.
No, I prefer to use a semi-gloss paint for bathroom ceilings. Mold & mildew tends to grow quicker on flat paint and it’s harder to clean.
Use a product that is a mold-remover and follow the instructions. It’s very important to make sure the area is well ventilated and use a face mask when using these products.
I like Dulux products because they’re strong, durable and easy to use. However there are many excellent brands on the market.


