Quick lInks navigation for this post
Water leaks are a frustrating issue – you’re not alone! This post delves into potential causes and practical solutions to resolve the leak.
We’ve featured a case study that you might resonate with, and a guide to fix the problem, step-by-step.
Reasons for water leaks
I know that dealing with a leaking shower base can be frustrating as there are several common possible causes:
- The tap could be leaking inside the wall leading to water seepage
- A poorly installed pipe join
- In some of the older PVC water pipes, leaks occur if rats have gnawed into the pipe
- Waterproofing leaks through poor installation or damaged when the tiling was done
- The outlet (drain) or shower screen could be leaking
- Silicone sealant around the shower might need to be replaced
When a shower hasn’t been installed properly or a renovation has been poorly executed, you can be sure that you’ll eventually have leakage problems. Water will always make it’s way downwards to the lowest point.
Case Study
This shower was renovated just a year ago and is the perfect example of a poorly executed job.
Let me share the project with you highlighting a problematic shower renovation and the lessons to draw from it… And how to fix them.
The reno was completed, but signs that something was amiss were evident from the start. Much to the distress of the property owner! The contractor was called back to fix the problem.
But instead of addressing the cause by removing and replacing the base where the problem was, the contractor opted for a ‘band-aid’ solution and hoped for the best.
The property was then rented out and unfortunately the owners weren’t notified of the ongoing small leak.
Fast forward a year, and what was a minor issue has escalated into a major problem necessitating a full shower renovation and a replacement of a relatively new vanity due to the water damage.
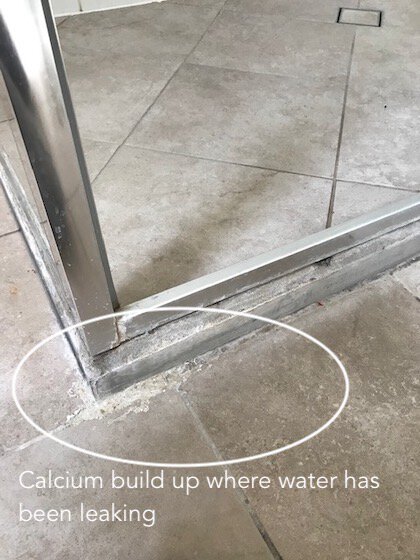
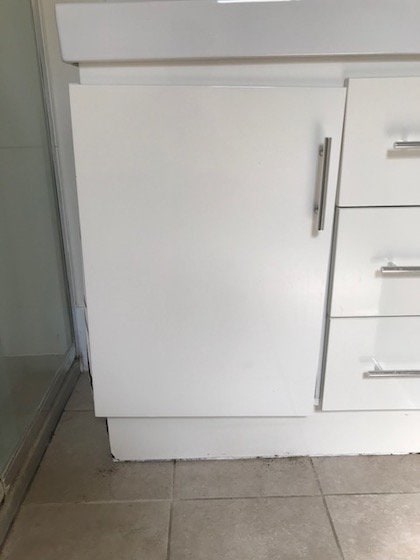
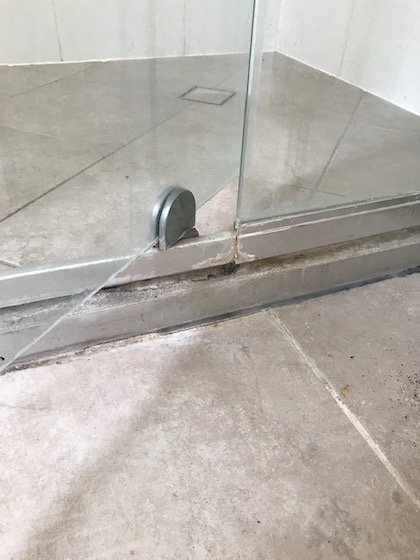
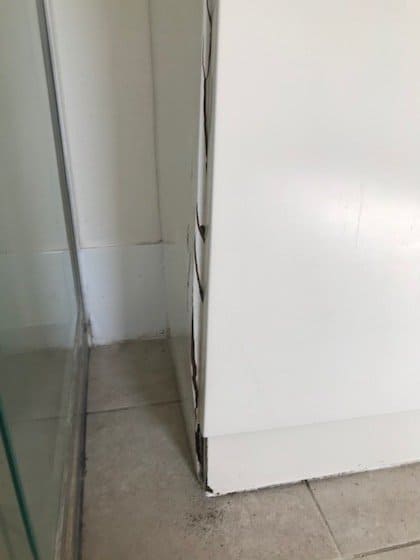
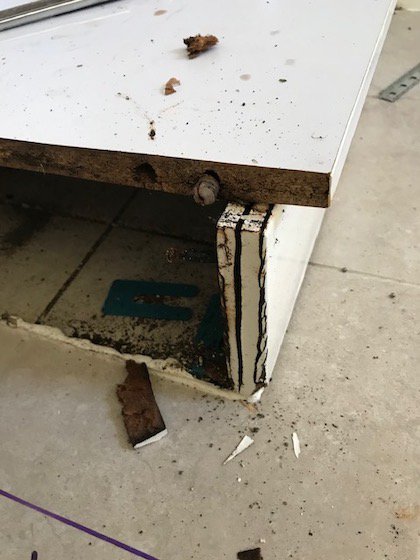
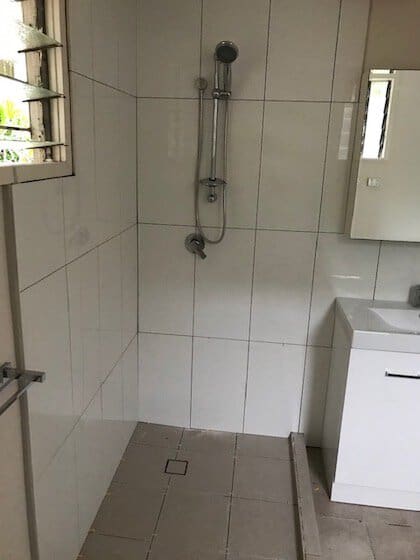
Notice how the water has been seeping under the shower screen frame, making its way to the vanity. This caused damage to the vanity causing it to swell due to water damage. The extent of the damage was such that the door misaligned and ended up on an angle.
Investigation
When the shower screen was removed and the tiles pulled up, it turned out that the situation was worse than I had originally thought.
It appears that the tiler didn’t allow for enough fall towards the drain in the center of the shower.
And instead of removing the tiles and redoing it correctly, he chose to tile over the existing ones.
Unfortunately, this approach simply made the problem worse. It was a totally lazy short-term fix. It temporarily hid the problem but has caused much greater expense down the line.
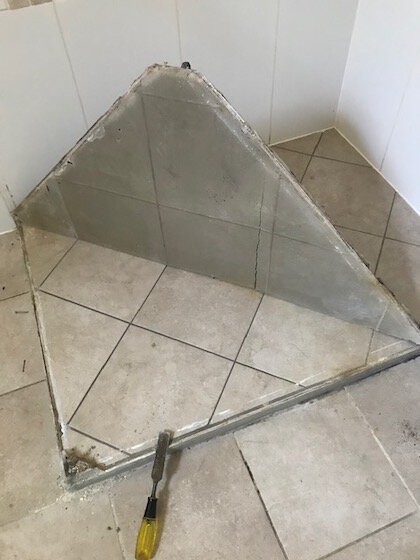
A shower like this one needs to have a hob* around two sides of the shower to trap the water. The shower screen then sits on top of the hob.
This shower is a ‘worst case scenario’ where multiple problems are exposed.
- fall to the drain wasn’t adequate
- shower didn’t have a hob
- old tiles were simply tiled over to mask a problem
Let’s start this job again to make sure it’s all done properly.
As always, look after your own safety, see our full disclaimer prior to using this information.
The How To : Fix a shower leaking from the base
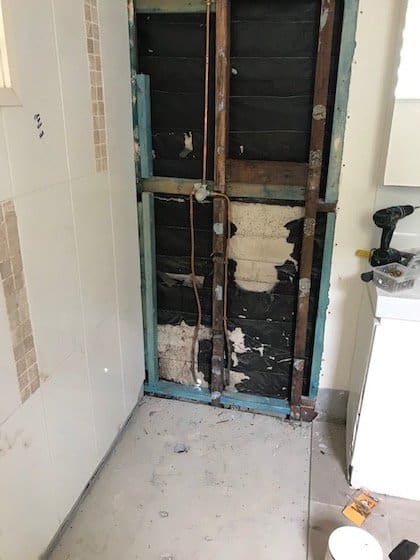
Step 1 Replace plumbing behind walls
Since I no longer had confidence in the previous work, I began by replacing all the plumbing behind the wall sheets. That was my starting point.
Step 2
Re-sheeted walls and prepare the floor for waterproofing.
Step 3
The floor is marked to indicate where the hob* is to be placed and where waterproofing is to be applied. (See FAQ’s to find explanation of a hob)
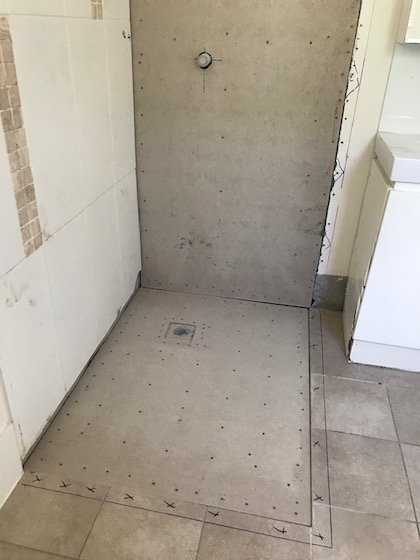
Step 4 Waterproofing
Waterproofing is finished but this time a hob has been installed on 2 sides of the shower.
It’s important to allow waterproofing to dry for at least 48 hours, (depending on the weather), before any further work is done on the shower.
It’s good to have a fan blowing on the drying waterproofing the whole time. Once dry, the waterproofing forms a like a thick layer of rubber-like paint.
Waterproofing is now contained within the shower recess.
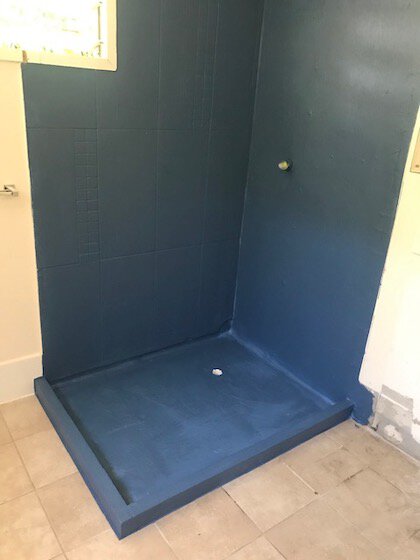
Important : Waterproofing
It’s crucial to avoid damage to the waterproofing when working on or around the area. Think of it like a plastic bag full of water – even the smallest pinprick can lead to a tiny leak. Over time the water will leak out and find its way to the lowest point.
Step 5
A concrete bed is now poured in the shower floor with a fall towards the waste. The fall should be between 1:60 and 1:80.
Step 6 Tile and Grout
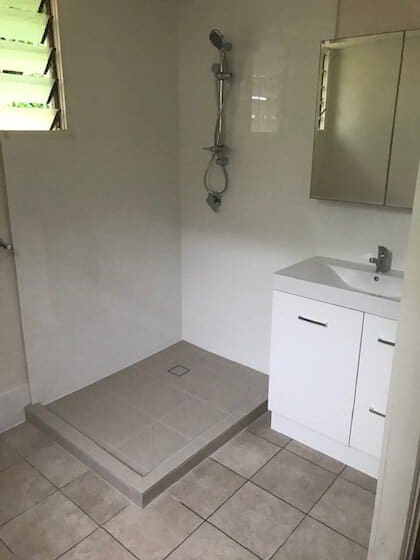
Shower is now tiled and grouted, ready for shower screen to be installed.
Don’t know how to grout? Watch our grouting video on this link
Step 7 Shower Screen
The shower screen must be installed on the inside edge of the hob to ensure that when water hits the shower screen it’s directed into the shower recess and not outside the shower.
Step 8 New vanity is installed
The problem has been fixed properly, providing the owner with peace of mind. With a thorough and proper job, the risk of water leaks and damage is eliminated.
The approach is straightforward, but like any job, it’s essential to handle this with care. Doing it properly now can save you paying the price for poor workmanship later on.
FAQs
A barrier, or small step, around the base of a shower area that is one brick high. The hob usually supports a shower screen and its purpose is to contain water within the shower area. A hob can extend wall to wall in a large shower; or in a small 36″ x 36″ (900mm x 900mm), shower 2 sides as in this project.
White powdery marks are calcium. Calcium is in water and the substance builds up on your shower screen and in places where water is pooling.
A typical small shower measures 36″ x 36″ (or 900mm x 900mm). 30″ x 30″ would be an absolute minimum. Average rectangle sizes vary. For example you may have a 60″ x 30″ or 60″ x 42″. The dimensions, and style, will vary depending on the space that can be allocated to the shower.
Bathroom size, layout, functionality, and aesthetics ultimately determine the size.
It’s stressful finding your shower is leaking water and it can cause a lot of expense if it’s not fixed quickly. Water damage spreads fast, so any leaks should be addressed as soon as they’re noticed.


